はじめに
anible-runnerとansible-builderは名前こそ聞いたことがあったが触ったことがありませんでした。
Pythonのスクリプトからansibleを動かしたいなと考えたときに、ansible-runnerが使えるという情報をいただいたので入門してみました。
まずは手始めにansible-builderで作成したコンテナをansible-runnerで動かすのをやってみようと思います。
ansible-builder
Ansible BuilderはAnsibleの実行環境をコンテナで用意するためのPythonモジュール
ansible-runner
Ansible Runnerは、コンテナを介してPlaybookを起動したり
Pythonスクリプトなどに組み込むことで直接Ansibleの起動が可能になるPythonモジュール
前提条件
コンテナの実行環境を事前に準備しておく必要があります
私は事前にDocekrをインストールしておきました。
インストール
ansible-builder/ansible-runnerはpipでインストールが可能です。
$ pip install ansible-builder
$ pip install ansible-runner
Anibleのインストールは不要です
$ pip freeze | grep ansible

ansible-builder==1.0.1
ansible-runner==2.0.1
Build環境の準備
まず、初めにansible-builderを使って実行環境のコンテナ(execution-environment)の設定を定義したファイルを作成します
execution-environment.yml
---
version: 1.1
dependencies:
  galaxy: requirements.yml
  python: requirements.txt

additional_build_steps:
  prepend: |
    RUN pip3 install --upgrade pip setuptools
  append:
    - RUN ls -la /etc
dependenciesのgalaxy/pythonで定義したrequirementsファイルを作成していきます
additional_build_stepsでBuild時に実施するコマンドを定義できます
(ここでansibleを削除し、任意のVersionをインストールしようとしましたが失敗してしまいました、、本筋ではないので省略します)
pythonのライブラリをインストールするためにrequirements.txtを作成する(中身は適当です)
requirements.txt.yml
paramiko
jmespath
netaddr
インストールするCollectionなどを記載するrequirements.ymlを作成します
requirements.yml
---
collections:
  - name: ansible.netcommon
  - name: ansible.utils
Build
事前のDocker Imagesを確認
$ docker images
REPOSITORY   TAG       IMAGE ID   CREATED   SIZE
Build(数分かかります)
$ ansible-builder build --tag ee001
Running command:
  docker build -f context/Dockerfile -t ee001 context
Complete! The build context can be found at: /home/xx/xx/context
オプション--verbosityを利用することでログを表示が可能です
また、コマンド実行時にcontextディレクトが作成されDockerfileやrequirements.txtなどが格納されます
--contextを指定することで任意のPATHに作成が可能です
--build-arg EE_BASE_IMAGEオプションを指定するとpullするイメージファイルを選べるようです
※ただし、初めからansibleが入っているimageじゃないと動かなさそう・・
オプション付きBuild
$ ansible-builder build --tag ee002 --verbosity 3 --context tmp
Ansible Builder is building your execution environment image, "ee002".
File tmp/_build/requirements.yml will be created.
File tmp/_build/requirements.txt will be created.
File tmp/_build/ansible.cfg will be created.
Rewriting Containerfile to capture collection requirements
Running command:
  docker build -f tmp/Dockerfile -t ee002 tmp
Sending build context to Docker daemon  6.656kB
Step 1/22 : ARG EE_BASE_IMAGE=quay.io/ansible/ansible-runner:latest
Step 2/22 : ARG EE_BUILDER_IMAGE=quay.io/ansible/ansible-builder:latest
Step 3/22 : FROM $EE_BASE_IMAGE as galaxy
 ---> 7f28c304a37a
Step 4/22 : ARG ANSIBLE_GALAXY_CLI_COLLECTION_OPTS=
 ---> Using cache
 ---> 817d228223c7
Step 5/22 : USER root
 ---> Using cache
 ---> abe073792147
Step 6/22 : ADD _build/ansible.cfg ~/.ansible.cfg
 ---> Using cache
 ---> 86f235ef5837
Step 7/22 : ADD _build /build
 ---> Using cache
 ---> 1d4ae1669f34
Step 8/22 : WORKDIR /build
 ---> Using cache
 ---> 3222fad0e2e6
Step 9/22 : RUN ansible-galaxy role install -r requirements.yml --roles-path /usr/share/ansible/roles
 ---> Using cache
 ---> c43f05572389
Step 10/22 : RUN ansible-galaxy collection install $ANSIBLE_GALAXY_CLI_COLLECTION_OPTS -r requirements.yml --collections-path /usr/share/ansible/collections
 ---> Using cache
 ---> 714d46cd3e58
Step 11/22 : FROM $EE_BUILDER_IMAGE as builder
 ---> 5806c16c9ae2
Step 12/22 : COPY --from=galaxy /usr/share/ansible /usr/share/ansible
 ---> Using cache
 ---> 6348ad77818a
Step 13/22 : ADD _build/requirements.txt requirements.txt
 ---> Using cache
 ---> 555ce006fb1c
Step 14/22 : RUN ansible-builder introspect --sanitize --user-pip=requirements.txt --write-bindep=/tmp/src/bindep.txt --write-pip=/tmp/src/requirements.txt
 ---> Using cache
 ---> 29d5ad112a18
Step 15/22 : RUN assemble
 ---> Using cache
 ---> 2bcba19d4f70
Step 16/22 : FROM $EE_BASE_IMAGE
 ---> 7f28c304a37a
Step 17/22 : USER root
 ---> Using cache
 ---> a8ea1ddb1c81
Step 18/22 : RUN pip3 install --upgrade pip setuptools
 ---> Using cache
 ---> 342d9b393f12
Step 19/22 : COPY --from=galaxy /usr/share/ansible /usr/share/ansible
 ---> Using cache
 ---> 5a355f923a51
Step 20/22 : COPY --from=builder /output/ /output/
 ---> Using cache
 ---> 2f14d46eac3e
Step 21/22 : RUN /output/install-from-bindep && rm -rf /output/wheels
 ---> Using cache
 ---> b86981d1e55f
Step 22/22 : RUN ls -la /etc
 ---> Using cache
 ---> e94c237fcda9
Successfully built e94c237fcda9
Successfully tagged ee002:latest

Complete! The build context can be found at: /home/xx/xx/tmp
tmpにDokcerfileなどが格納されます
imagesを確認すると、指定したtagでimageが作成されたことが確認できます
(ついでにいろいろ増えているのはよくわからないですが、、、)
$ docker images
REPOSITORY                        TAG       IMAGE ID       CREATED         SIZE
ee001                             latest    e94c237fcda9   4 minutes ago   741MB
ee002                             latest    e94c237fcda9   4 minutes ago   741MB
<none>                            <none>    2bcba19d4f70   4 minutes ago   779MB
<none>                            <none>    714d46cd3e58   6 minutes ago   708MB
quay.io/ansible/ansible-runner    latest    7f28c304a37a   8 hours ago     703MB
quay.io/ansible/ansible-builder   latest    5806c16c9ae2   8 hours ago     611MB
runner環境準備
imageができたのでansible-runnerを動かしてみます
ansible-runnerは利用前に下記2個のディレクトリを作成します
- env: runnerの実行のために必要な設定を格納する
- project: playbookやinventoryを格納する
ansible-runnerを実行時には/projectsの配下を見に行くようで、projectsディレクトリを作成しその配下にPlaybookを配置する必要があるようです
xxx
├── env
│   └── settings
└── project
    └── playbooks
        └── sample001.yml
env/settingsで実行対象のimagesファイルの指定などを行っています
process_isolationはプレイブックを実行するファイルシステム上のどのディレクトリにアクセスできるかを制限するものらしいです
(Towerでいうところの分離されたジョブってところがイメージ近いかな?)
container_image: ee001  <--ここでBuilderで作成したImageを指定
process_isolation_executable: docker
process_isolation: true
ここで実行対象のコンテナイメージを指定しなかった場合quay.io/ansible/ansible-runner:deveというimageが自動的にダウンロードされ実行されます
runner実行時に--container-imageオプションを使っても指定可能です。
settingに対象イメージを書いていると--container-imageオプションよりも優先されるような動きをしました
用意したPlaybookはLocalhostに対してコマンドを実行するシンプルなものです
(おまけで最後にcollectionsで追加したnetcommonが使えるか確認しています)
sample001.yml
---
- hosts: localhost
  connection: local
  gather_facts: false

  tasks:
    - name: send command
      command: ansible --version
      register: res_version

    - name: debug version
      debug:
        msg: "{{ res_version.stdout_lines }}"

    - name: send command
      command: ansible-galaxy collection list
      register: res_collections

    - name: debug version
      debug:
        msg: "{{ res_collections.stdout_lines }}"

    - name: send command
      command: pip freeze
      register: res_pip_freeze

    - name: debug version
      debug:
        msg: "{{ res_pip_freeze.stdout_lines }}"

    - name: debug ip
      debug:
        msg: "{{ ip | ansible.netcommon.ipv4 }}"
      vars:
        ip: '192.168.1.1/32'
runner実行
それでは実行をしてみます
ansible-runner run コマンドで実行します
runの後はprojectが格納されているディレクトリを指定し、-pでplaybookを指定します
runnerはprojectディレクトリにあるファイルを参照するので、少し注意が必要です。
ここで-p project/playbooks/sample001.ymlのようにパスを指定してしまうと失敗してしまいます。
$ ansible-runner run . -p playbooks/sample001.yml
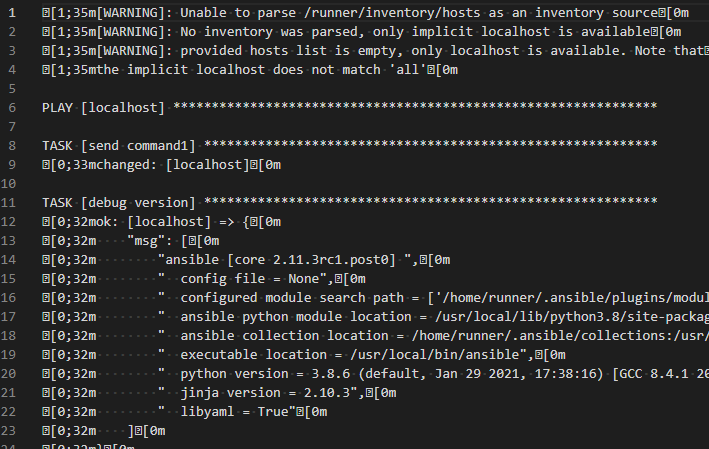
[WARNING]: Unable to parse /runner/inventory/hosts as an inventory source
[WARNING]: No inventory was parsed, only implicit localhost is available
[WARNING]: provided hosts list is empty, only localhost is available. Note that
the implicit localhost does not match 'all'
PLAY [localhost] ***************************************************************
TASK [send command1] ***********************************************************
changed: [localhost]
TASK [debug version] ***********************************************************
ok: [localhost] => {
"msg": [
"ansible [core 2.11.3rc1.post0] ",
" config file = None",
" configured module search path = ['/home/runner/.ansible/plugins/modules', '/usr/share/ansible/plugins/modules']",
" ansible python module location = /usr/local/lib/python3.8/site-packages/ansible",
" ansible collection location = /home/runner/.ansible/collections:/usr/share/ansible/collections",
" executable location = /usr/local/bin/ansible",
" python version = 3.8.6 (default, Jan 29 2021, 17:38:16) [GCC 8.4.1 20200928 (Red Hat 8.4.1-1)]",
" jinja version = 2.10.3",
" libyaml = True"
]
}
TASK [send command2] ***********************************************************
changed: [localhost]
TASK [debug collection] ********************************************************
ok: [localhost] => {
"msg": [
"",
"# /usr/share/ansible/collections/ansible_collections",
"Collection Version",
"----------------- -------",
"ansible.netcommon 2.2.0 ",
"ansible.utils 2.3.0 "
]
}
TASK [send command3] ***********************************************************
changed: [localhost]
TASK [debug pip freeze] ********************************************************
ok: [localhost] => {
"msg": [
"ansible-core @ file:///output/wheels/ansible_core-2.11.3rc1.post0-py3-none-any.whl",
"ansible-pylibssh==0.2.0",
"ansible-runner @ file:///output/wheels/ansible_runner-2.0.0.0a4.dev61-py3-none-any.whl",
"asn1crypto==1.2.0",
"attrs==21.2.0",
"Babel==2.7.0",
"bcrypt==3.2.0",
"cffi==1.13.2",
"chardet==3.0.4",
"cryptography==2.8",
"decorator==5.0.9",
"docutils==0.17.1",
"dumb-init==1.2.5",
"future==0.18.2",
"gssapi==1.6.14",
"idna==2.8",
"Jinja2==2.10.3",
"jmespath==0.10.0",
"jsonschema==3.2.0",
"jxmlease==1.0.3",
"lockfile==0.12.2",
"lxml==4.4.1",
"MarkupSafe==1.1.1",
"ncclient==0.6.12",
"netaddr==0.8.0",
"ntlm-auth==1.5.0",
"packaging==21.0",
"paramiko==2.7.2",
"pexpect==4.8.0",
"ply==3.11",
"ptyprocess==0.7.0",
"pyasn1==0.4.8",
"pycparser==2.19",
"pykerberos==1.2.1",
"PyNaCl==1.4.0",
"pyOpenSSL==19.1.0",
"pyparsing==2.4.7",
"pypsrp==0.5.0",
"pyrsistent==0.18.0",
"PySocks==1.7.1",
"pyspnego==0.1.6",
"python-daemon==2.3.0",
"pytz==2019.3",
"pywinrm==0.4.2",
"PyYAML==5.4.1",
"requests==2.22.0",
"requests-credssp==1.2.0",
"requests-ntlm==1.1.0",
"resolvelib==0.5.4",
"six==1.12.0",
"textfsm==1.1.2",
"toml==0.10.2",
"ttp==0.7.1",
"urllib3==1.25.7",
"xmltodict==0.12.0"
]
}
TASK [debug ip] ****************************************************************
ok: [localhost] => {
"msg": "192.168.1.1/32"
}
PLAY RECAP *********************************************************************
localhost : ok=7 changed=3 unreachable=0 failed=0 skipped=0 rescued=0 ignored=0
正常に完了しました
完了すると、artifactsディレクトリが生成され、その中に実行結果やjob_eventが表示されます
stdoutを見るとAnsibleで実行した結果が見れるのですが、色コード?のようなものが入ってしまって見にくいです。。
まとめ
ansible-builderとansible-runnerに入門してみました
コンテナイメージを作成しておいて、実行時だけ起動するというのはとてもスマートだなと感じました
venvを切ってライブラリを・・・と今まで当たり前のようにやっていましたが、builderとrunnerを利用して簡単に環境のセットアップができるようになれば良いなと思います。
いまいちわからなかったのが、ansibleを任意のVersionで実行したい場合。。こちら継続で調べたいと思います・・
次回はPythonスクリプトにansible-runnerを組み込んでみる
公式Docs
ansible-runner.readthedocs.io
ansible-builder.readthedocs.io


